Choosing sweets that make your baby-shower photo zone unforgettable: trends, tips and local ideas
Why the photo zone matters more than you think
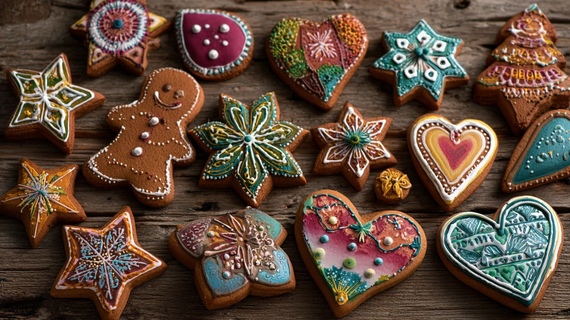
A baby-shower photo zone is where memories crystallise. It is the backdrop guests gather around, the stage for the cake reveal and the space that ends up dominating your camera roll. Sweets are not just snacks here - they become colour, texture and storytelling. Set them up thoughtfully and your photos feel editorial without hiring a stylist. In the North West, hosts often blend soft pastels with a single bold accent, like cornflower blue or peach, then anchor the look with one hero dessert and a chorus of matching bite-size pieces. If you want an instantly cohesive look for pictures, start by choosing a clear theme, a defined palette and one stand-out sweet to build around. For many Manchester families, that centrepiece is themed gingerbread in Manchester set on acrylic risers, with little iced details that echo the invitation design.
Start with the palette and the light
Before you even choose flavours, think like a photographer. Natural daylight near a window will flatter icing colours and reduce harsh shadows. If you are in a cosy living room or a restaurant snug, borrow a simple uplighter to soften the background. Keep three tones across the table - one main pastel, one secondary hue and a neutral like cream or biscuit. Avoid too many metallics that can flare on camera. When in doubt, matte finishes photograph better than glossy glazes.
Creating a story in three layers
- Layer 1 - backdrop: a fabric panel or paper arch in your primary colour.
- Layer 2 - height: cake stands, boxes wrapped in matching paper or a rented plinth.
- Layer 3 - detail: hand-iced biscuits, mini meringue kisses, petite cupcakes and ribboned tags.
This three-layer approach keeps photos tidy, helps guests navigate and guarantees every sweet shows up clearly in group shots.
Picking the hero sweet: gingerbread or cake?
For baby showers, two crowd-pleasing options dominate - character-led gingerbread and a statement cake. Gingerbread wins for personalisation, durability on display and the way iced motifs pop on camera. Cake wins for theatre and the classic slice-and-celebrate moment. There is no rule that says you cannot have both. Many hosts place a modest two-tier cake centre-front and flank it with character biscuits that spell the baby’s name or play with motifs - tiny sleepsuits, rattles, clouds or stars.
How much is enough?
A practical guide many UK planners use is 2 to 3 small bites per guest plus the ceremonial slice. For a guest list of 18 to 24 people, plan one medium cake, 24 to 36 decorated biscuits and a few bowls of fruit or marshmallows to cleanse the palate. If you expect a late-arriving relative crew or plenty of children, add a dozen mini cupcakes. Waste is lower when you standardise sizes - 6 cm biscuits photograph well, line up neatly and fit little favour boxes.
Taste that photographs well
Vivid colours can be gorgeous on screen, but flavour still matters. Subtle spice notes perform beautifully in cooler months while citrus and vanilla feel springlike. For gingerbread, ask for a balanced spice blend - ginger forward with a soft honey finish - so the biscuits are photogenic and genuinely moreish. If your cake is lemon, echo that zest in a light glaze on mini biscuits, so the table tastes as coherent as it looks.
Placement and perspective tricks
Place the tallest item slightly off-centre - it adds dynamism to pictures. Angle a few biscuits towards the lens for flat-lay photos, and keep a small clean board nearby so you can whisk a selection to a window for a quick portrait shot. Use plain ribbon ties with tiny name flags - those add human scale and help guests pick their moment without disturbing the arrangement.
Local touches Manchester families love
Manchester hosts often weave in nods to the city - a subtle bee motif on one biscuit, a moody blue accent to tip the hat to club colours, or soft industrial props like a brushed metal frame that echoes our architecture. It is little choices like these that make the gallery feel local and heartfelt rather than “template pretty”. You can also add a micro “activity” element - a five-minute icing flourish that guests can try under guidance - so the photo zone becomes a moment as well as a setting.
A smart way to personalise without clutter
Names, dates and tiny icons are delightful, but keep them consistent. Choose one lettering style and stick to it across the cake plaque, the biscuit tags and the signage. This small discipline pays off in photos - everything looks like it belongs together.
Practical checklist for a calm setup
Essentials to prepare the day before
- Wipe plinths, stands and risers - smudges show under camera flash.
- Pre-fit backing tape or museum gel under stands to prevent wobbles.
- Pack a “sweet survival kit” - wipes, spare ribbon, extra tags, scissors, a small offset spatula.
- Print a one-page layout sketch so helpers know where each plate goes.
- Freeze gel packs if the room can get warm, then hide them under a drape to keep the bottom tier cool.
Styling moves that always work
- Group in threes - three stands of varying heights feel balanced.
- Repeat a motif at least three times - stars on two biscuits and one cake topper make a pattern.
- Leave breathing room - negative space around the hero sweet lets photos look editorial.
- Add a single texture break - a linen runner or rattan tray warms clean, modern lines.
Sustainability and dietary care
Parents are increasingly choosing options with simpler labels and reduced waste. You can ask your maker for natural ingredients gingerbread with precise allergen notes and recyclable packaging. Offer at least one inclusive bite like a gluten-free biscuit or a dairy-free cupcake. Clear labels not only protect guests - they photograph nicely and tell a thoughtful story about your planning.
Budgeting without losing the wow
Think in “impact per pound”. The biggest returns come from a) one well-finished centrepiece, b) coordinated colours and c) tidy heights. You can save by simplifying flavours and investing in finish - clean edges, neat piping and consistent shapes. Hire stands if you need several - rental is often cheaper than buying three quality pieces you may store for a year. If your venue charges for early setup, pre-assemble trays off-site so you only place and tweak on arrival.
A quick plan for different themes
- Soft clouds and lullabies: Pastel blues and creams, cloud-shaped biscuits, a lemon-vanilla cake with light ruffles and a tiny moon topper.
- Spring meadow: Blush pinks, sage and ivory, floral-iced biscuits, vanilla sponge with strawberry preserve and edible flowers used sparingly.
- Little explorer: Neutral sand and olive, map-style biscuit stencils, ginger-honey cake with simple line-art animals for timeless photos.
How to collaborate smoothly with your maker
Share your invitation artwork, venue photos and the window direction. Ask for two mock-up angles - front-on and three-quarter - so you can imagine the camera’s perspective. Confirm final portion counts a week before, and keep a small buffer for late RSVPs. If you are in the city centre, check loading rules for your building - a calm 20-minute window to place the table makes all the difference.
When cake takes centre stage
If you prefer the drama of a slice, scale back the surrounding pieces so the main tier can breathe. A soft buttercream finish filmed in natural light looks elegant and contemporary. Pair it with a few keepsake biscuits as favours and a tidy acrylic sign. It is surprising how minimal the table can be while still reading “celebration” in every frame. Many Manchester families round things off with personalised cakes in Manchester that mirror the biscuit details for a polished, locally grounded finish.
Final thought
A baby-shower photo zone is a small stage with a big job - telling your family’s story. Choose sweets that taste as lovely as they look, keep the styling simple and intentional, and lean into local details that make your gallery feel like Manchester, not a catalogue. Your photos will thank you, and your guests will feel part of something warm and beautifully made.
Quick recommendations to print and keep
- Decide theme, palette and hero sweet first - then book your maker.
- Prioritise finish over quantity - fewer, better pieces photograph best.
- Plan heights and angles - your camera loves variety.
- Label allergens clearly and offer an inclusive option.
- Leave space around the hero - less crowding, more elegance.